| 小白YOLOv5全流程 | 您所在的位置:网站首页 › yolov5 文字识别 › 小白YOLOv5全流程 |
小白YOLOv5全流程
|
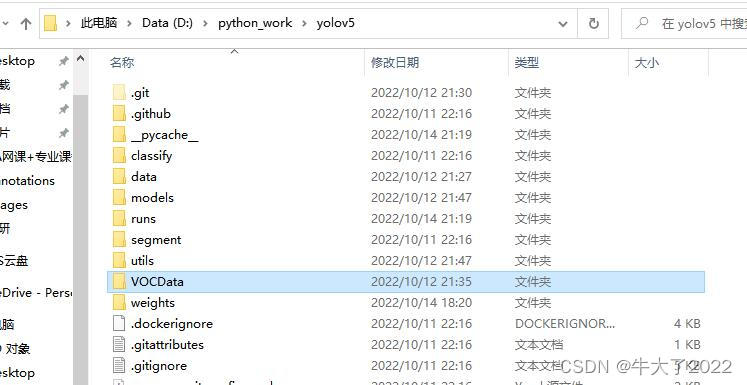
目录 一、配置 二、准备相关文件进行训练 三、使用labelImg标注图片 1.安装labellmg 2.使用 labellmg 四.划分数据集以及配置文件的修改 1.在VOCData目录下创建程序 split_train_val.py 并运行 2.将xml格式转为yolo_txt格式 3.配置文件 五、聚类获得先验框 1.生成anchors文件 2.修改模型配置文件 六、模型训练 1.开始训练 1.5问题分析: 2.训练过程 七、测试效果 一、配置注意:安装涉及的路径不要有中文 anaconda中新建一个虚拟环境,python3.9 ,pytorch1.12.1,yolov5 v6.0 yolov5源码下载:GitHub - ultralytics/yolov5: YOLOv5 🚀 in PyTorch > ONNX > CoreML > TFLite (如若使用GPU,cuda version >=10.1,自己搜cuda下载配置) git clone https://github.com/ultralytics/yolov5 # clone cd yolov5 pip install -r requirements.txt # install 安装各种包 二、准备相关文件进行训练1.在yolov5文件夹下新建一个文件夹,这里取名为VOCData
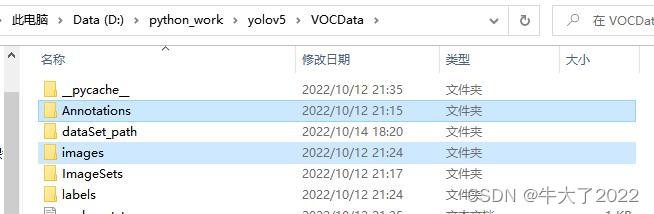
2.进入后新建两个文件夹 Annotations 和 images(图中多余是之后生成的)
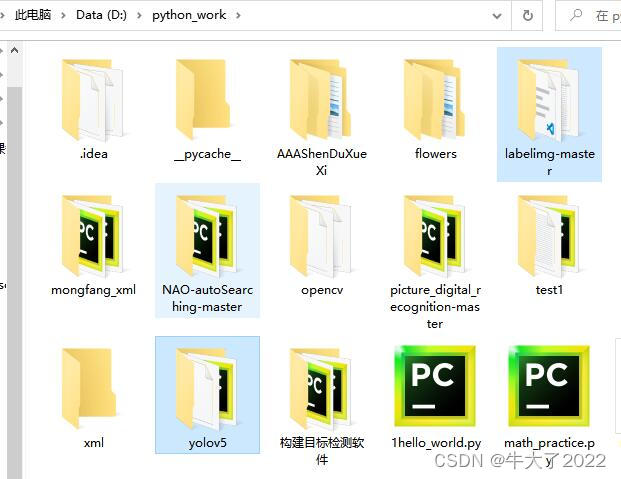
images:用于存放要标注的图片(jpg格式) Annotations :用于存放标注图片后产生的内容(这里采用XML格式) 三、使用labelImg标注图片 1.安装labellmg下载labelImg:https://github.com/tzutalin/labelImg 下载后存放目录到yolov5同级下面
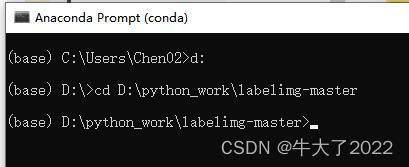
从anaconda prompt终端中选择到此文件
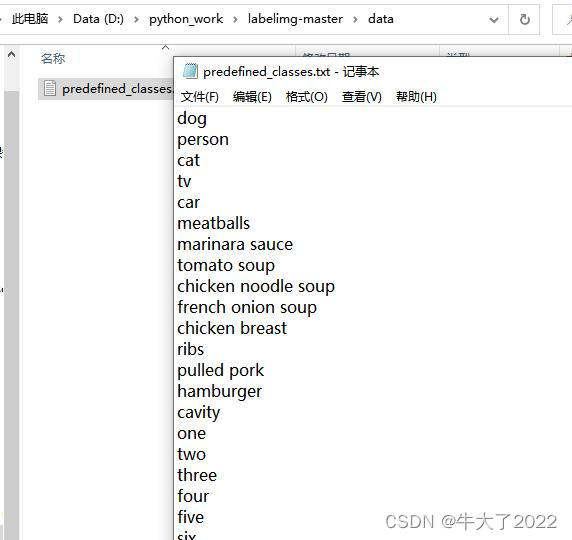
执行命令前,建议更新一下conda conda update -n base -c defaults conda 然后执行以下命令 conda install pyqt=5 conda install -c anaconda lxml pyrcc5 -o libs/resources.py resources.qrc 2.使用 labellmg使用前在labellmg文件夹中->data->predefined_classes.txt 点开可以添加要标准的类别,否则每次进入软件添加比较麻烦
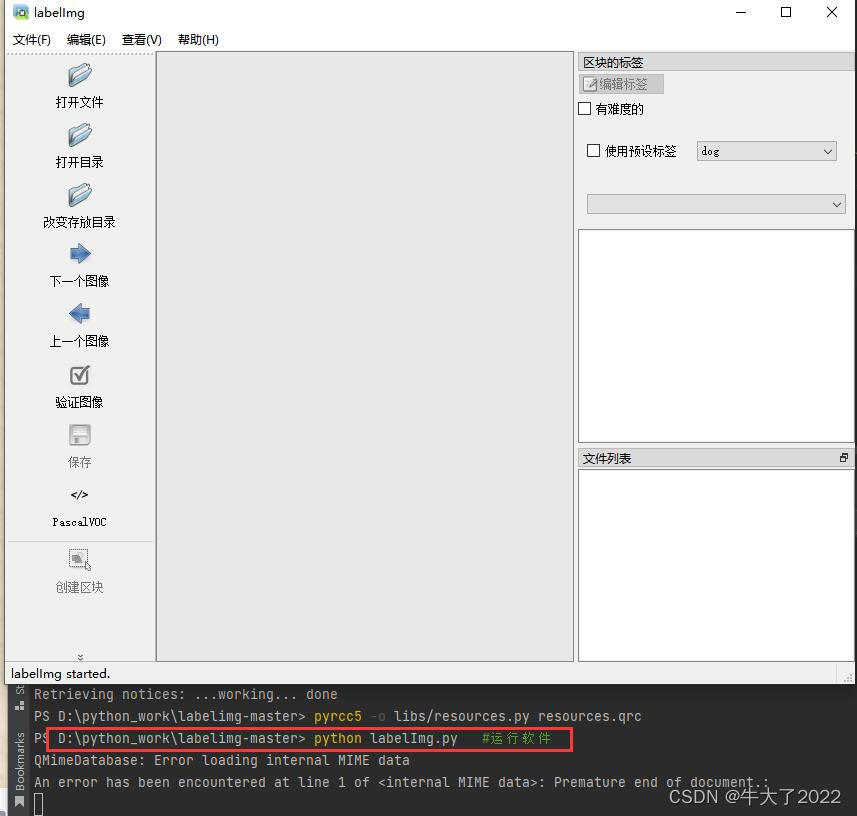
打开labellmg(要进入labellmg文件夹运行,这里使用pycharm打开labellmg文件夹转到目录下再运行) python labelImg.py #运行软件
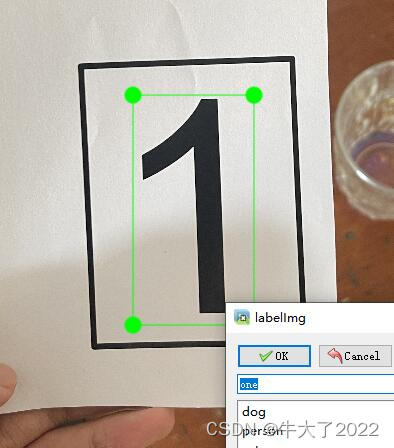
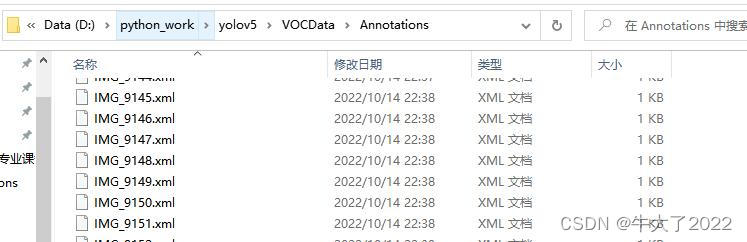
(找数据集总结出来的方法:目标检测YOLOv5数据集怎么找?_牛大了2022的博客-CSDN博客) 把要标注的图片放D:\python_work\yolov5\VOCData\images 标完后保存到D:\python_work\yolov5\VOCData\Annotations (导出时选择默认的xml格式) 左上角 打开文件,左下部创建区块,圈中后选择识别标签,最后点左边保存存到Annotations中(可以自动保存文件夹,选择打开文件夹,下一张下一张的框出就行,而且一张图可以多个)
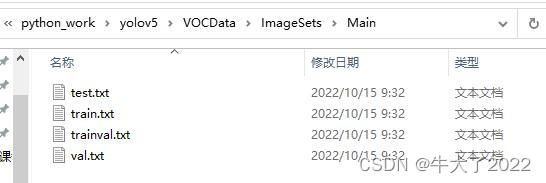
不用修改 # coding:utf-8 import os import random import argparse parser = argparse.ArgumentParser() #xml文件的地址,根据自己的数据进行修改 xml一般存放在Annotations下 parser.add_argument('--xml_path', default='Annotations', type=str, help='input xml label path') #数据集的划分,地址选择自己数据下的ImageSets/Main parser.add_argument('--txt_path', default='ImageSets/Main', type=str, help='output txt label path') opt = parser.parse_args() trainval_percent = 1.0 # 训练集和验证集所占比例。 这里没有划分测试集 train_percent = 0.9 # 训练集所占比例,可自己进行调整 xmlfilepath = opt.xml_path txtsavepath = opt.txt_path total_xml = os.listdir(xmlfilepath) if not os.path.exists(txtsavepath): os.makedirs(txtsavepath) num = len(total_xml) list_index = range(num) tv = int(num * trainval_percent) tr = int(tv * train_percent) trainval = random.sample(list_index, tv) train = random.sample(trainval, tr) file_trainval = open(txtsavepath + '/trainval.txt', 'w') file_test = open(txtsavepath + '/test.txt', 'w') file_train = open(txtsavepath + '/train.txt', 'w') file_val = open(txtsavepath + '/val.txt', 'w') for i in list_index: name = total_xml[i][:-4] + '\n' if i in trainval: file_trainval.write(name) if i in train: file_train.write(name) else: file_val.write(name) else: file_test.write(name) file_trainval.close() file_train.close() file_val.close() file_test.close()运行完后会在VOCData\ImagesSets\Main下生成 测试集、训练集、训练验证集和验证集
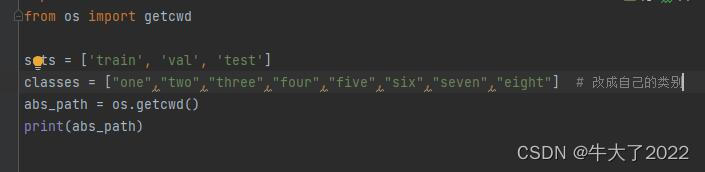
在VOCData目录下创建程序 text_to_yolo.py 并运行 开头classes部分改成自己的类别
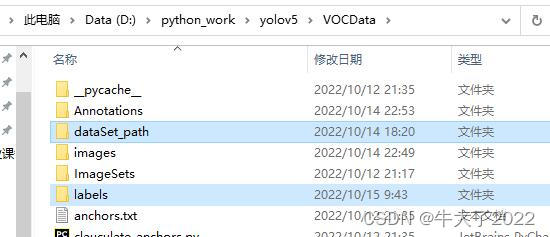
之后路径也要改成自己的,注意倒数第三行后缀是.png还是.jpg # -*- coding: utf-8 -*- import xml.etree.ElementTree as ET import os from os import getcwd sets = ['train', 'val', 'test'] classes = ["one","two","three","four","five","six","seven","eight"] # 改成自己的类别 abs_path = os.getcwd() print(abs_path) def convert(size, box): dw = 1. / (size[0]) dh = 1. / (size[1]) x = (box[0] + box[1]) / 2.0 - 1 y = (box[2] + box[3]) / 2.0 - 1 w = box[1] - box[0] h = box[3] - box[2] x = x * dw w = w * dw y = y * dh h = h * dh return x, y, w, h def convert_annotation(image_id): in_file = open('D:/python_work/yolov5/VOCData/Annotations/%s.xml' % (image_id), encoding='UTF-8') out_file = open('D:/python_work/yolov5/VOCData/labels/%s.txt' % (image_id), 'w') tree = ET.parse(in_file) root = tree.getroot() size = root.find('size') w = int(size.find('width').text) h = int(size.find('height').text) for obj in root.iter('object'): difficult = obj.find('difficult').text # difficult = obj.find('Difficult').text cls = obj.find('name').text if cls not in classes or int(difficult) == 1: continue cls_id = classes.index(cls) xmlbox = obj.find('bndbox') b = (float(xmlbox.find('xmin').text), float(xmlbox.find('xmax').text), float(xmlbox.find('ymin').text), float(xmlbox.find('ymax').text)) b1, b2, b3, b4 = b # 标注越界修正 if b2 > w: b2 = w if b4 > h: b4 = h b = (b1, b2, b3, b4) bb = convert((w, h), b) out_file.write(str(cls_id) + " " + " ".join([str(a) for a in bb]) + '\n') wd = getcwd() for image_set in sets: if not os.path.exists('D:/python_work/yolov5/VOCData/labels/'): os.makedirs('D:/python_work/yolov5/VOCData/labels/') image_ids = open('D:/python_work/yolov5/VOCData/ImageSets/Main/%s.txt' % (image_set)).read().strip().split() if not os.path.exists('D:/python_work/yolov5/VOCData/dataSet_path/'): os.makedirs('D:/python_work/yolov5/VOCData/dataSet_path/') list_file = open('dataSet_path/%s.txt' % (image_set), 'w') for image_id in image_ids: list_file.write('D:/python_work/yolov5/VOCData/images/%s.JPG\n' % (image_id)) convert_annotation(image_id) list_file.close()运行完后会生成如下 labels 文件夹和 dataSet_path 文件夹
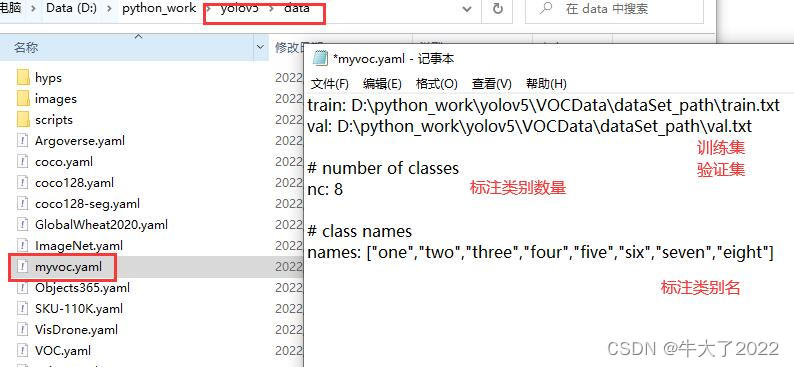
其中 labels 中为不同图像的标注文件。每个图像对应一个txt文件,文件每一行为一个目标的信息,包括class, x_center, y_center, width, height格式,这种即为 yolo_txt格式。 dataSet_path文件夹包含三个数据集的txt文件,train.txt等txt文件为划分后图像所在位置的绝对路径,如train.txt就含有所有训练集图像的绝对路径。 3.配置文件在 yolov5 目录下的 data 文件夹下 新建一个 myvoc.yaml文件(可以自定义命名),用记事本打开。 内容是: 训练集以及验证集(train.txt和val.txt)的路径(可以改为相对路径) 以及 目标的类别数目和类别名称。
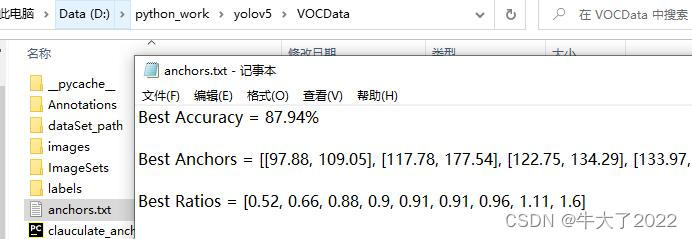
//注意:冒号后面要加空格 train: D:\python_work\yolov5\VOCData\dataSet_path\train.txt val: D:\python_work\yolov5\VOCData\dataSet_path\val.txt # number of classes nc: 8 # class names names: ["one","two","three","four","five","six","seven","eight"] 五、聚类获得先验框 1.生成anchors文件在VOCData目录下创建程序两个程序 kmeans.py 以及 clauculate_anchors.py 不需要运行 kmeans.py,运行 clauculate_anchors.py 即可。 kmeans.py 程序如下:这不需要运行,也不需要更改,报错则查看第十三行内容。 import numpy as np def iou(box, clusters): """ Calculates the Intersection over Union (IoU) between a box and k clusters. :param box: tuple or array, shifted to the origin (i. e. width and height) :param clusters: numpy array of shape (k, 2) where k is the number of clusters :return: numpy array of shape (k, 0) where k is the number of clusters """ x = np.minimum(clusters[:, 0], box[0]) y = np.minimum(clusters[:, 1], box[1]) if np.count_nonzero(x == 0) > 0 or np.count_nonzero(y == 0) > 0: raise ValueError("Box has no area") # 如果报这个错,可以把这行改成pass即可 intersection = x * y box_area = box[0] * box[1] cluster_area = clusters[:, 0] * clusters[:, 1] iou_ = intersection / (box_area + cluster_area - intersection) return iou_ def avg_iou(boxes, clusters): """ Calculates the average Intersection over Union (IoU) between a numpy array of boxes and k clusters. :param boxes: numpy array of shape (r, 2), where r is the number of rows :param clusters: numpy array of shape (k, 2) where k is the number of clusters :return: average IoU as a single float """ return np.mean([np.max(iou(boxes[i], clusters)) for i in range(boxes.shape[0])]) def translate_boxes(boxes): """ Translates all the boxes to the origin. :param boxes: numpy array of shape (r, 4) :return: numpy array of shape (r, 2) """ new_boxes = boxes.copy() for row in range(new_boxes.shape[0]): new_boxes[row][2] = np.abs(new_boxes[row][2] - new_boxes[row][0]) new_boxes[row][3] = np.abs(new_boxes[row][3] - new_boxes[row][1]) return np.delete(new_boxes, [0, 1], axis=1) def kmeans(boxes, k, dist=np.median): """ Calculates k-means clustering with the Intersection over Union (IoU) metric. :param boxes: numpy array of shape (r, 2), where r is the number of rows :param k: number of clusters :param dist: distance function :return: numpy array of shape (k, 2) """ rows = boxes.shape[0] distances = np.empty((rows, k)) last_clusters = np.zeros((rows,)) np.random.seed() # the Forgy method will fail if the whole array contains the same rows clusters = boxes[np.random.choice(rows, k, replace=False)] while True: for row in range(rows): distances[row] = 1 - iou(boxes[row], clusters) nearest_clusters = np.argmin(distances, axis=1) if (last_clusters == nearest_clusters).all(): break for cluster in range(k): clusters[cluster] = dist(boxes[nearest_clusters == cluster], axis=0) last_clusters = nearest_clusters return clusters if __name__ == '__main__': a = np.array([[1, 2, 3, 4], [5, 7, 6, 8]]) print(translate_boxes(a))运行:clauculate_anchors.py 会调用 kmeans.py 聚类生成新anchors的文件 程序如下: 需要更改第 9 、13行文件路径 以及 第 16 行标注类别名称 # -*- coding: utf-8 -*- # 根据标签文件求先验框 import os import numpy as np import xml.etree.cElementTree as et from kmeans import kmeans, avg_iou FILE_ROOT = "D:/python_work/yolov5/VOCData/" # 根路径 ANNOTATION_ROOT = "Annotations" # 数据集标签文件夹路径 ANNOTATION_PATH = FILE_ROOT + ANNOTATION_ROOT ANCHORS_TXT_PATH = "D:/python_work/yolov5/VOCData/anchors.txt" #anchors文件保存位置 CLUSTERS = 9 CLASS_NAMES = ['one','two','three','four','five','six','seven','eight'] #类别名称 def load_data(anno_dir, class_names): xml_names = os.listdir(anno_dir) boxes = [] for xml_name in xml_names: xml_pth = os.path.join(anno_dir, xml_name) tree = et.parse(xml_pth) width = float(tree.findtext("./size/width")) height = float(tree.findtext("./size/height")) for obj in tree.findall("./object"): cls_name = obj.findtext("name") if cls_name in class_names: xmin = float(obj.findtext("bndbox/xmin")) / width ymin = float(obj.findtext("bndbox/ymin")) / height xmax = float(obj.findtext("bndbox/xmax")) / width ymax = float(obj.findtext("bndbox/ymax")) / height box = [xmax - xmin, ymax - ymin] boxes.append(box) else: continue return np.array(boxes) if __name__ == '__main__': anchors_txt = open(ANCHORS_TXT_PATH, "w") train_boxes = load_data(ANNOTATION_PATH, CLASS_NAMES) count = 1 best_accuracy = 0 best_anchors = [] best_ratios = [] for i in range(10): ##### 可以修改,不要太大,否则时间很长 anchors_tmp = [] clusters = kmeans(train_boxes, k=CLUSTERS) idx = clusters[:, 0].argsort() clusters = clusters[idx] # print(clusters) for j in range(CLUSTERS): anchor = [round(clusters[j][0] * 640, 2), round(clusters[j][1] * 640, 2)] anchors_tmp.append(anchor) print(f"Anchors:{anchor}") temp_accuracy = avg_iou(train_boxes, clusters) * 100 print("Train_Accuracy:{:.2f}%".format(temp_accuracy)) ratios = np.around(clusters[:, 0] / clusters[:, 1], decimals=2).tolist() ratios.sort() print("Ratios:{}".format(ratios)) print(20 * "*" + " {} ".format(count) + 20 * "*") count += 1 if temp_accuracy > best_accuracy: best_accuracy = temp_accuracy best_anchors = anchors_tmp best_ratios = ratios anchors_txt.write("Best Accuracy = " + str(round(best_accuracy, 2)) + '%' + "\r\n") anchors_txt.write("Best Anchors = " + str(best_anchors) + "\r\n") anchors_txt.write("Best Ratios = " + str(best_ratios)) anchors_txt.close()运行生成anchors文件。如果生成文件为空,重新运行即可。 第二行 Best Anchors 后面需要用到。(这就是手动获取到的anchors的值)
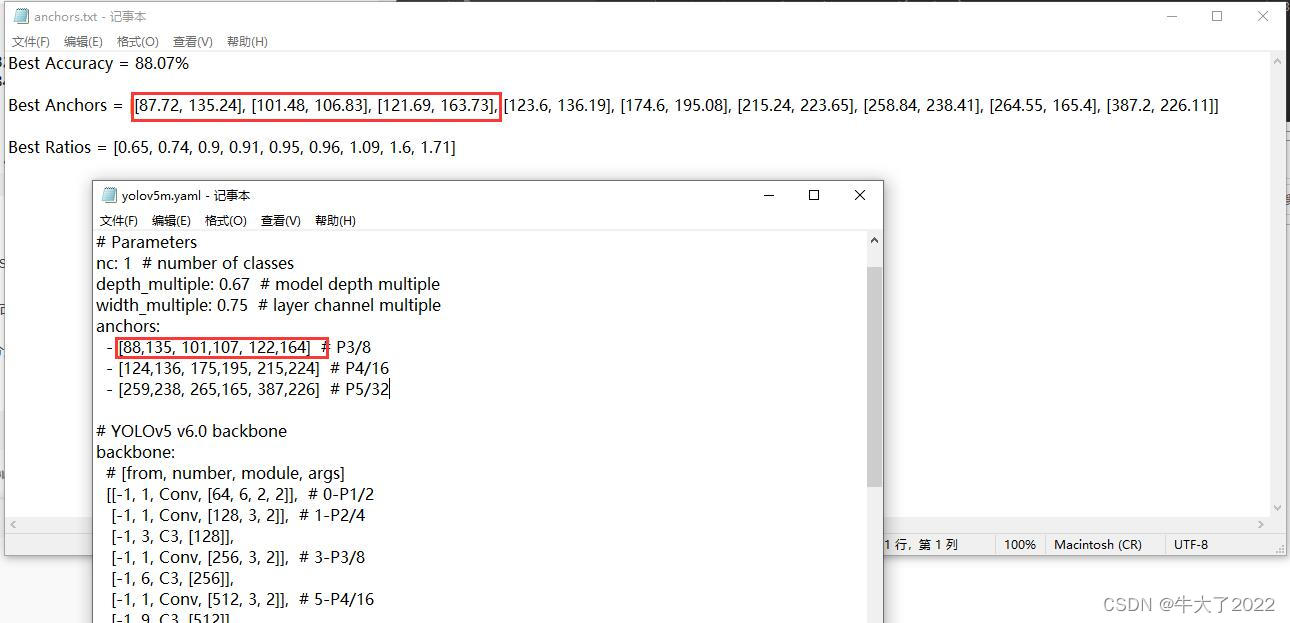
选择一个模型,在yolov5目录下的model文件夹下是模型的配置文件,有n、s、m、l、x版本,逐渐增大(随着架构的增大,训练时间也是逐渐增大)。 这里选用 yolov5s.yaml 用记事本打开 主要改两个参数: 把 nc:后面改成自己的标注类别数(图里还没改,而且图里错打开yolov5m了...) 修改anchors,根据 anchors.txt 中的 Best Anchors 修改,需要取整(四舍五入、向上、向下都可以)。 保持yaml中的anchors格式不变,按顺序一对一即可,如我框出的六个和anchors的第一行6个(18个都要改)
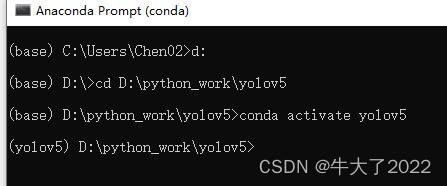
打开anaconda终端,选到yolov5的文件下,并激活相应的环境(我起名是yolov5)
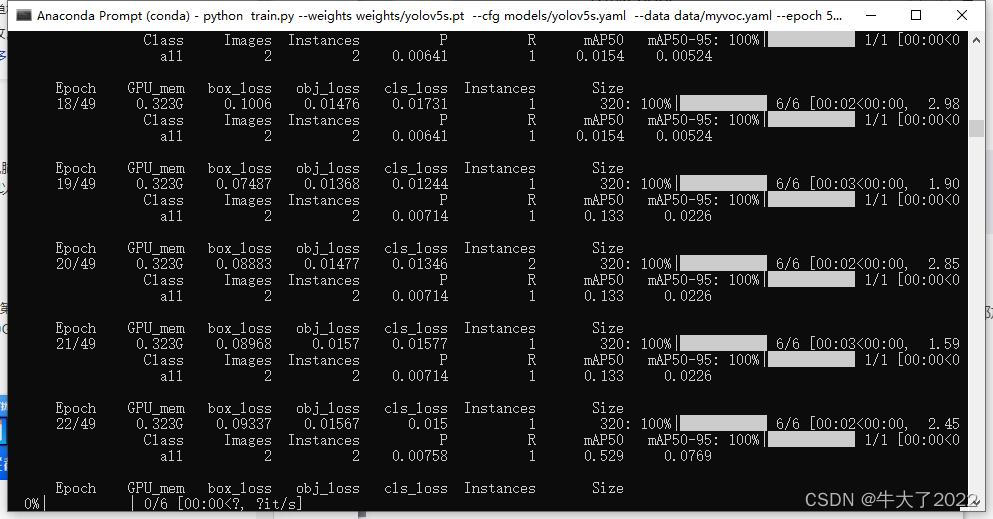
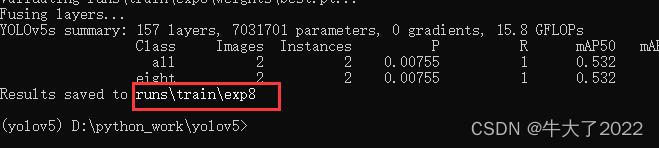
接着输入如下训练命令: python train.py --weights weights/yolov5s.pt --cfg models/yolov5s.yaml --data data/myvoc.yaml --epoch 200 --batch-size 8 --img 640 --device 0 参数解释: –weights weights/yolov5s.pt :这个也许你需要更改路径。我是将yolov5的pt文件都放在weights目录下,你可能没有,需要更改路径。 –epoch 200 :训练200次 –batch-size 8:训练8张图片后进行权重更新 –device cpu:使用CPU训练。//这里device 0为gpu训练 1.5问题分析:报错1:页面太小,无法完成操作——解决:虚拟内存不足,我设置了一下电脑的虚拟内存然后就可以了,(参考这个)或者降低线程 --workers (默认是8) ,调小 --batch-size,降低 --epoch。 2.训练过程训练时间有点长,146张图片,要识别八个数字,用gpu一共训练了20来分钟?(没细算)
训练好的模型会被保存在 yolov5 目录下的 runs/train/weights/expxx下。
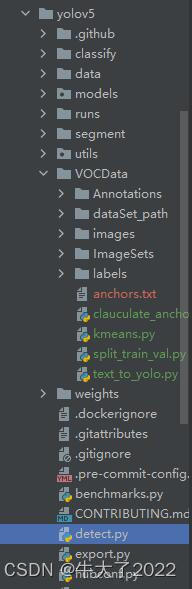
yolov5主目录下找到detect.py文件,打开该文件。
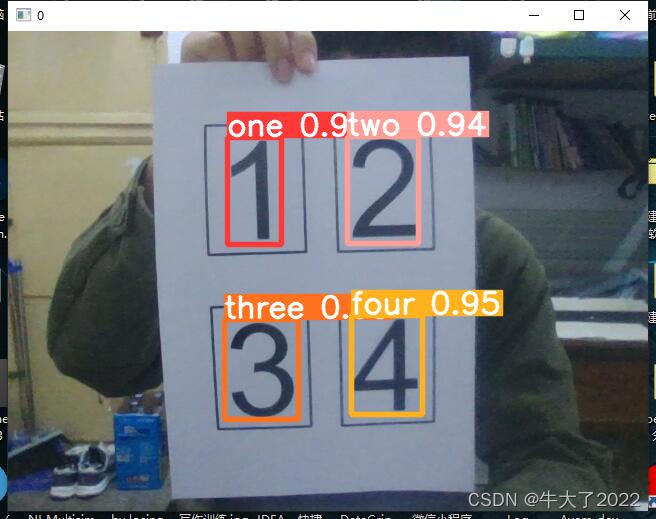
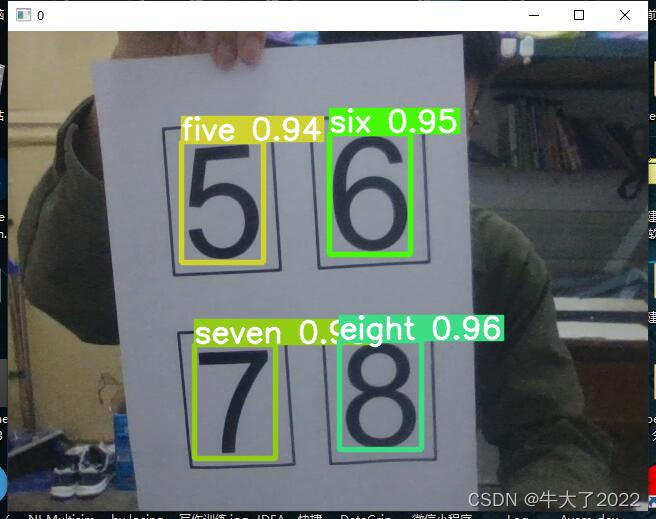
主要是weights和source处修改: 以打开笔记本摄像头为例子: 加载训练器:找到这行并修改 parser.add_argument('--weights', nargs='+', type=str, default='runs/train/exp8/weights/best.pt', help='model.pt path(s)')加载摄像头进行识别:(图片视频default修改路径就行如'test1.jpg',摄像头default为0) parser.add_argument('--source', type=str, default=0, help='source') #file/dir/URL/glob/screen/0(webcam)运行detect.py:
训练图片越多准确率越高,我每个数字只训练了70张左右,准确率还是喜人的! 近日我也有在博客发关于yolov5的模型解析,欢迎大家来捧场~ 深度学习Week9-YOLOv5-C3模块实现(Pytorch)_牛大了2022的博客-CSDN博客 参考文章:初学入门YOLOv5手势识别之制作并训练自己的数据集 Yolov5训练自己的数据集(详细完整版) 目标检测---教你利用yolov5训练自己的目标检测模型 |
【本文地址】